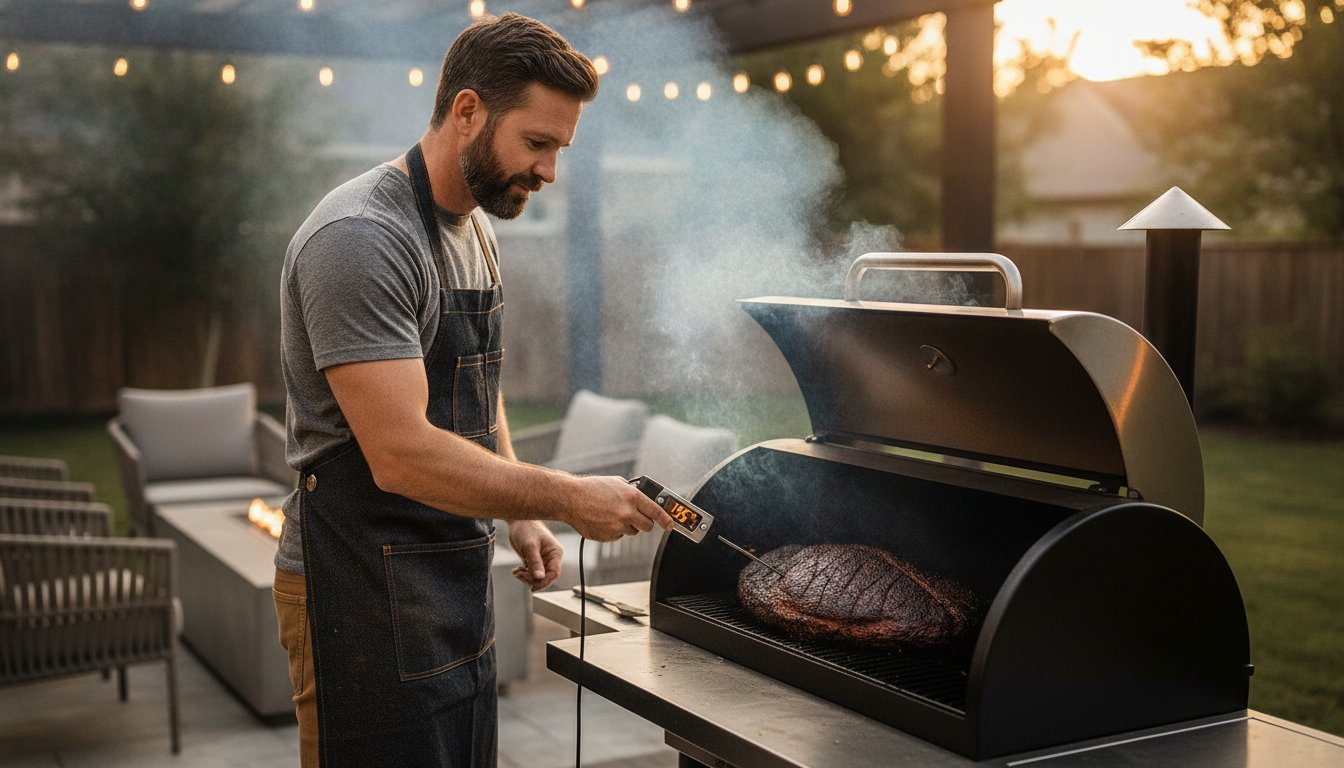
Barbecue is a craft of patience, not just a cooking method. Most people think a great meal happens over a hot, fast flame, but the real magic actually happens when you turn the heat down! This bar-b-que 101 approach is the secret to moving beyond basic grilling and into the world of true smokehouse flavors. We know how frustrating it is to spend your hard-earned money on a beautiful cut of meat only to have it come out dry. It is equally stressful when your grill temperature won't stay steady or you feel confused by different wood options. You want your backyard to be a place of joy and connection for your family!
This guide is here to help you master the "low and slow" philosophy and the essential tools you need for success. We promise to help you transform your outdoor space into a professional smokehouse. You will learn the fundamental techniques and flavor secrets that produce tender, delicious results every time you cook. We are excited to walk you through the basics of heat management, wood selection, and the reliable accessories that make grilling easy. Let's get started on your journey to becoming a confident backyard master!
Key Takeaways
- Learn the fundamental difference between high-heat grilling and the "low and slow" method used for tender ribs and brisket.
- Discover why a reliable meat thermometer is the most important tool in your bar-b-que 101 kit!
- Master temperature control with simple techniques like the Snake Method to keep your fire burning steady for hours.
- Create professional flavor profiles using basic dry rub ingredients and simple binders that help your spices stick!
- Transform your backyard into a welcoming smokehouse by pairing your grill with comfortable outdoor furniture for the ultimate host experience.
Table of Contents
- What is Bar-b-que 101? Defining the Low and Slow Method
- Essential Gear: Building Your Beginner BBQ Kit
- The Golden Rules of Temperature and Smoke Management
- Prepping for Success: Rubs, Woods, and Patience
- Creating Your Perfect Backyard BBQ Space
What is Bar-b-que 101? Defining the Low and Slow Method
Barbecue is more than just a way to cook food. It is a slow, rhythmic process that turns tough cuts of meat into something tender and delicious! While many people use the word "barbecue" to describe any outdoor meal, true bar-b-que 101 focuses on the "low and slow" method. This means using low temperatures over many hours. Smoke is the secret ingredient here. It does more than just add flavor; it actually helps break down the connective tissues in the meat. This process creates that beautiful pink "smoke ring" just under the surface. Enthusiasts love this ring because it shows the meat was cooked with care and the right amount of wood smoke. It's a badge of honor for any backyard pitmaster!
Grilling vs. Barbecuing: A Critical Distinction
Grilling is what you do for a quick Tuesday night dinner. You cook burgers or steaks directly over a hot flame. This is direct heat. In contrast, barbecuing uses indirect heat. You place the meat away from the fire and let the warm air circulate like an oven. For a successful bar-b-que 101 session, you want to keep your grill between 225°F and 275°F. At these temperatures, time becomes your most important tool. You cannot rush a good brisket or a rack of ribs. It takes hours of steady warmth to reach perfection. We believe that this patience is what makes the experience so rewarding for you and your guests!
The Three Pillars of Great Backyard BBQ
Success in the backyard depends on three main things. We want you to feel confident every time you light the fire. Focus on these pillars to get the best results:
- Consistency: Your main goal is keeping a steady temperature. If your heat jumps up and down, your meat will be dry or unevenly cooked. Reliability is key to a great meal.
- Clean Smoke: You want to see "blue smoke." This is a thin, almost invisible mist that smells sweet. Avoid "dirty smoke," which is thick and white. It can make your food taste bitter and ruin your hard work.
- Quality Prep: Great results start before you even light the charcoal. Trimming your meat and applying the right spices ensures the smoke can do its job effectively.
The work starts long before the fire is lit. By preparing your space and your meat correctly, you set yourself up for a win. We are here to make sure you have the right accessories to manage these pillars with ease! When you understand these basics, you are well on your way to mastering the art of the smokehouse.
Essential Gear: Building Your Beginner BBQ Kit
You don't need to spend a fortune to get started. A solid bar-b-que 101 kit focuses on reliability and safety. We believe that having the right tools makes the whole experience much more enjoyable! It allows you to focus on the food rather than fighting with your equipment. When you have the right gear, you can cook with confidence and pride. We want your first session to be a total success!
The most important tool in your kit is a meat thermometer. Cooking by time is a common mistake for beginners. Meat is done when it reaches the right internal temperature, not when the clock says so! A reliable thermometer prevents you from serving dry food or undercooked meat. It's the best way to ensure your family enjoys a safe and delicious meal every time you light the fire.
Safety is just as important as flavor. You need long-handled utensils to keep your hands away from the heat. These tools give you the precision to flip heavy cuts without dropping them. We also suggest wearing heat-resistant gloves. They allow you to move hot grates or adjust charcoal baskets safely. Protective gear is a small investment that makes a big difference in your comfort during a long cook.
Must-Have Grilling and Cooking Accessories
We recommend a dual-probe thermometer for any beginner. One probe stays in the meat. The other monitors the temperature of the grill itself. This helps you maintain that "low and slow" environment we discussed earlier. You also need high-quality tongs and spatulas. Look for ones designed for heavy cuts of meat like brisket or pork shoulder. You can find these and other Essential Grilling Accessories for Every Home Chef in our curated collection. Having durable gear ensures you are prepared for those long, rewarding cooks! If you need to upgrade your setup, our grilling and cooking accessories are built to last.
Choosing Your Fuel Source: Charcoal vs. Wood
Fuel is where your flavor begins. Mastering your fuel is a big step in your bar-b-que 101 education. Many beginners start with briquettes because they burn very consistently and are easy to find. Lump charcoal is another great option. It burns hotter and is made from real wood pieces. This provides a more natural taste for your meat. If you want extra flavor, add wood chunks like hickory or apple to the coals. These release a sweet smoke that enhances the natural juices of the meat. One rule we always follow is to avoid lighter fluid! It leaves a chemical taste on your food that is hard to ignore. Instead, use a chimney starter or natural fire starters. It's a cleaner way to get your fire going and keeps your food tasting pure.
The Golden Rules of Temperature and Smoke Management
Managing heat is the most important skill you will learn in bar-b-que 101. It takes a little practice, but we are here to guide you every step of the way! To start, you must stabilize your grill before the meat ever touches the grate. Light a small amount of charcoal and let the temperature rise slowly. It is much easier to increase the heat than it is to lower it once the metal gets hot. We want you to feel in control of your fire from the very beginning!
For those long, 10-hour cooks, you need a fuel strategy that lasts. We recommend the "Snake Method" for kettle grills. You simply line up unlit briquettes in a semi-circle around the edge of your grill and light one end. It burns slowly like a fuse! If you have a smoker box, the "Minion Method" is also excellent. You fill the chamber with unlit coal and drop a few hot embers on top. Both methods provide hours of steady, reliable heat without the need for constant refilling. This allows you to relax and enjoy the process!
Your air vents are the steering wheel of your grill. Open the bottom vents to let in more oxygen when you need more heat. Close them slightly to choke the fire and bring the temperature down. Once you find the "sweet spot," leave the lid closed. Every time you peek inside, you lose valuable heat and moisture. Always remember the golden rule: if you are lookin, you aint cookin! Keeping the lid down ensures your meat stays juicy and tender.
The Art of the Indirect Zone
Setting up a 2-zone fire is a total game changer for beginners. Push all your hot coals to one side of the grill to create a direct heat zone. The other side becomes your indirect zone where the meat will cook slowly. We suggest placing a water pan on the charcoal grate under the meat. This adds moisture to the air and helps prevent sudden temperature spikes. Thermal mass is the ability of materials like heavy steel grates or water pans to store heat, which is vital for keeping your grill temperature steady during a long cook.
Identifying and Maintaining Clean Blue Smoke
The color of your smoke tells you exactly how your fire is performing. You are looking for "thin blue smoke" that is almost invisible to the eye. This is the sign of a clean-burning fire that adds a sweet, smoky flavor! If you see thick, billowy white smoke, your fire is struggling. This "dirty" smoke happens when the wood is smoldering without enough oxygen. It can leave a bitter, ashy taste on your food. Keep your top vents open to maintain good airflow. This prevents creosote from building up and ensures your meal tastes like it came from a professional smokehouse!
Prepping for Success: Rubs, Woods, and Patience
Preparing your meat is where the real flavor starts! In bar-b-que 101, we often say that the work you do before the fire is lit determines your success. It's about more than just throwing spices on a steak. Proper preparation ensures that every bite is packed with the smoky goodness you crave. We want you to feel proud of the crust and color you achieve on your very first try!
To get your spices to stay put, you need a binder. This is a thin layer of liquid that helps the rub stick to the surface. Most pitmasters use plain yellow mustard or a light coating of olive oil. Don't worry about the mustard flavor. It disappears during the long cook, leaving behind a perfectly seasoned exterior. It is a simple trick that makes a huge difference in your final result!
The Importance of the Dry Rub
A great dry rub usually follows a simple anatomy: salt, pepper, sugar, and heat. Salt is the most critical ingredient because it needs time to penetrate deep into the meat. This is called dry brining. We recommend salting your meat at least an hour before it hits the grill. Sugar is also essential for creating "bark." This is the dark, flavorful outer crust that forms as the sugar caramelizes with the smoke. For a classic bar-b-que 101 experience, try the "Dalmatian Rub." It is just equal parts coarse salt and cracked black pepper. It is simple, effective, and lets the natural flavor of the meat shine through!
Wood Flavor Profiles for Beginners
Think of wood smoke as another layer of seasoning. The type of wood you choose will change the personality of your dish. We suggest matching your wood to your meat for the best results:
- Fruitwoods (Apple/Cherry): These are perfect for poultry and lighter meats. They provide a sweet, mild flavor that doesn't overwhelm the food.
- Strong Hardwoods (Hickory/Mesquite): Use these for beef or heavy smoke flavor. Hickory is the traditional choice for pork ribs and shoulder!
Always make sure your wood is seasoned and dry. Green or wet wood will smolder and create that bitter white smoke we discussed earlier. If you are ready to get started, you can find the right grilling and cooking accessories at Shelly's to make your prep work easier!
Finally, you must prepare for the "stall." This is the moment during a long cook when the meat's internal temperature stops rising. It usually happens around 160°F and can last for hours! This is caused by evaporative cooling, much like how humans sweat to stay cool. The best thing you can do is wait it out. Don't turn up the heat or open the lid. Patience is the secret ingredient that every master pitmaster relies on!
Creating Your Perfect Backyard BBQ Space
A successful bar-b-que 101 journey involves more than just a grill and a thermometer. Since a great brisket can take ten hours or more, you need a space that supports your hard work! We believe that the environment you create is just as important as the rub you apply. If you are uncomfortable, the long cook will feel like a chore rather than a joy. We want you to enjoy every minute of your outdoor experience. A well-planned space also encourages your family and friends to gather around while you work. This turns a long cooking process into a social event that everyone can enjoy!
Setting the Stage with Outdoor Furniture
The pitmaster needs a place to rest while the smoke does its magic! Choosing durable seating is essential for those long afternoons spent tending the fire. You want chairs that can withstand the weather and provide comfort for hours at a time. We also suggest adding side tables near your cooking station. These tables are perfect for holding your prep trays, rubs, and favorite beverages. This keeps everything within reach so you don't have to leave the grill unattended. You can learn more about Choosing the Best Outdoor Furniture for Your Backyard to find the perfect fit for your style. Our collection of outdoor furniture is designed to turn your patio into a true extension of your home. We even offer outdoor pillows to add that extra layer of relaxation for your guests!
Staying Cool with Shade Covers and Canopies
Cooking in the direct sun for hours can be exhausting for anyone. A high-quality patio canopy or shade cover protects both you and your guests from the heat! It also keeps a sudden rain shower from ruining your fire or your furniture. When you set up your shade structures, always ensure there is plenty of ventilation. You never want smoke to get trapped under a canopy. Proper airflow keeps the air fresh and the "blue smoke" moving freely. It is all about creating a safe and comfortable zone for everyone involved in the cookout.
At Shelly’s Outdoor Decor, we are proud to be a Veteran-owned business. We take personal responsibility for helping you create a space where memories are made! From outdoor lighting to privacy screens, we offer everything you need to complete your backyard smokehouse. We invite you to explore our curated selection of durable products. With national shipping on all our accessories, we make it easy to build the setup of your dreams. We are honored to be a partner in your bar-b-que 101 journey and look forward to serving you!
Fire Up Your Backyard Smokehouse
Mastering the art of barbecue is a journey of patience and pride! You now have the foundations of the "low and slow" method to produce tender, flavorful meat every time. Remember that consistency is your best friend. By managing your air vents and trusting your thermometer, you can avoid the common pitfalls that ruin expensive cuts. Your bar-b-que 101 education is the first step toward hosting the most popular cookouts in the neighborhood!
We want to be your partner in this journey. Our team provides high-quality, durable outdoor cooking gear that you can rely on for years. As a Veteran-owned and operated business, we are committed to providing dependable service. It's our pleasure to offer national shipping across the USA to bring the best accessories right to your door. Shop our Veteran-owned collection of grilling accessories and outdoor decor!
We are so excited to see what you create on the grill. Grab your tongs, settle into your favorite outdoor chair, and enjoy the smoke. You have the skills to make something truly special for your family and friends. Happy grilling!
Frequently Asked Questions
What is the most important tool for a BBQ beginner?
A reliable digital meat thermometer is the single most important tool in your bar-b-que 101 kit! It takes all the guesswork out of your cook and keeps your family safe. You shouldn't rely on time alone because every cut of meat and every fire is different. Using a thermometer ensures your food is perfectly juicy every time. It's the best way to build your confidence as a new pitmaster!
How is BBQ different from regular grilling?
The main difference is the temperature and the total cooking time. Regular grilling uses high, direct heat to cook small items like burgers or hot dogs quickly. Barbecue uses low, indirect heat to slowly break down larger, tougher cuts of meat over many hours. It is a method that requires patience but rewards you with incredible tenderness. This "low and slow" approach is what creates true smokehouse flavor!
What is the best temperature for low and slow BBQ?
You should aim for a steady temperature between 225°F and 250°F for most low and slow cooks. This range is the sweet spot for rendering fat and softening connective tissues without drying out the meat. Staying consistent is more important than hitting a specific number. If your grill stays within this range, you'll produce professional results! It's why we emphasize using high-quality grilling accessories for heat management.
Can I do authentic BBQ on a standard gas grill?
Yes, you can definitely produce authentic flavors on a gas grill! You simply need to set up a two-zone heating system by turning on only one side of the burners. Place your meat on the unlit side so it doesn't burn. Use a smoker box or a foil pouch filled with wood chunks over the active burner to create smoke. It takes a little more attention to detail, but the results are delicious!
What is the "stall" and how do I handle it?
The stall is a natural part of the cooking process where the internal temperature of the meat stops rising for several hours. This happens because moisture is evaporating from the surface and cooling the meat down. You can handle it by being patient and waiting it out. If you are in a hurry, you can wrap the meat tightly in foil or butcher paper. This "Texas Crutch" helps trap heat and push through the stall!
How do I know which wood chunks to buy for my smoker?
Choose your wood based on the type of meat you are cooking for your bar-b-que 101 session. Mild fruitwoods like apple or cherry are perfect for poultry and pork because they won't overpower the flavor. Stronger hardwoods like hickory or oak are better suited for beef and heavy cuts. We always suggest using dry, seasoned wood chunks rather than chips. Chunks burn longer and provide a much more consistent stream of clean smoke!
Why is my BBQ meat coming out dry and tough?
Dry and tough meat is usually the result of cooking at a temperature that is too high or not allowing enough time. If the heat is too aggressive, the muscle fibers tighten up and squeeze out all the moisture! Another common mistake is skipping the resting period. Always let your meat rest for at least 30 to 60 minutes after cooking. This allows the juices to redistribute so every bite is moist and tender!
How do I clean my grilling accessories after a long cook?
You should clean your accessories with warm, soapy water and a soft brush after every use. For tough, stuck-on grease, a stainless steel wire brush works wonders on your grates while they are still slightly warm! We don't recommend putting your high-quality tools in the dishwasher because the harsh chemicals can damage the handles. Always dry your gear immediately to prevent rust. Keeping your tools clean ensures they stay reliable for your next session!